What is MCP?
Model Context Protocol (MCP) is an open standard that enables AI assistants to securely connect to external tools, data sources, and services. In IllumiChat, MCP integrations allow your AI assistants to access real-time information from your existing systems and workflows.How MCP Works
1
Assistant receives user query
A user asks a question that requires external data or action.
2
Assistant identifies need for MCP
The assistant determines that it needs to access external information or perform an action.
3
MCP connection established
The assistant securely connects to the configured MCP server.
4
Data retrieved or action performed
The MCP server fetches the required data or executes the requested action.
5
Response generated
The assistant incorporates the external data into its response to the user.
Benefits of MCP Integrations
Real-Time Data Access
- Live Information: Access current data from your systems
- Dynamic Responses: Provide up-to-date information to users
- Contextual Answers: Give responses based on actual system state
Enhanced Capabilities
- Action Execution: Perform tasks in external systems
- Data Retrieval: Fetch specific information on demand
- Workflow Integration: Connect to existing business processes
Security and Control
- Secure Connections: Encrypted communication between systems
- Access Control: Granular permissions for different operations
- Audit Trails: Track all MCP interactions and data access
Supported MCP Integrations
HubSpot Integration
Connect your assistant to HubSpot CRM and marketing data:HubSpot MCP
- Access contact and company information
- Retrieve deal and pipeline data
- Create and update records
- Send emails and track engagement
Jira Integration
Integrate with Jira project management:Jira MCP
- Retrieve issue and project information
- Create and update tickets
- Track project progress
- Manage workflows and transitions
Custom MCP Servers
Build your own MCP integrations:Custom MCP
- Connect to internal systems
- Access proprietary data sources
- Integrate with custom APIs
- Build specialized workflows
Setting Up MCP Integrations
Prerequisites
Before setting up MCP integrations, ensure you have:- An active IllumiChat account
- Access to the external system you want to integrate
- Appropriate permissions and API credentials
- Understanding of the data you want to access
Configuration Process
Method 1: Connect via Assistant Configuration
1
Access MCP Settings
Navigate to your assistant’s edit page and click on the “Tools” tab to find the MCP integration section.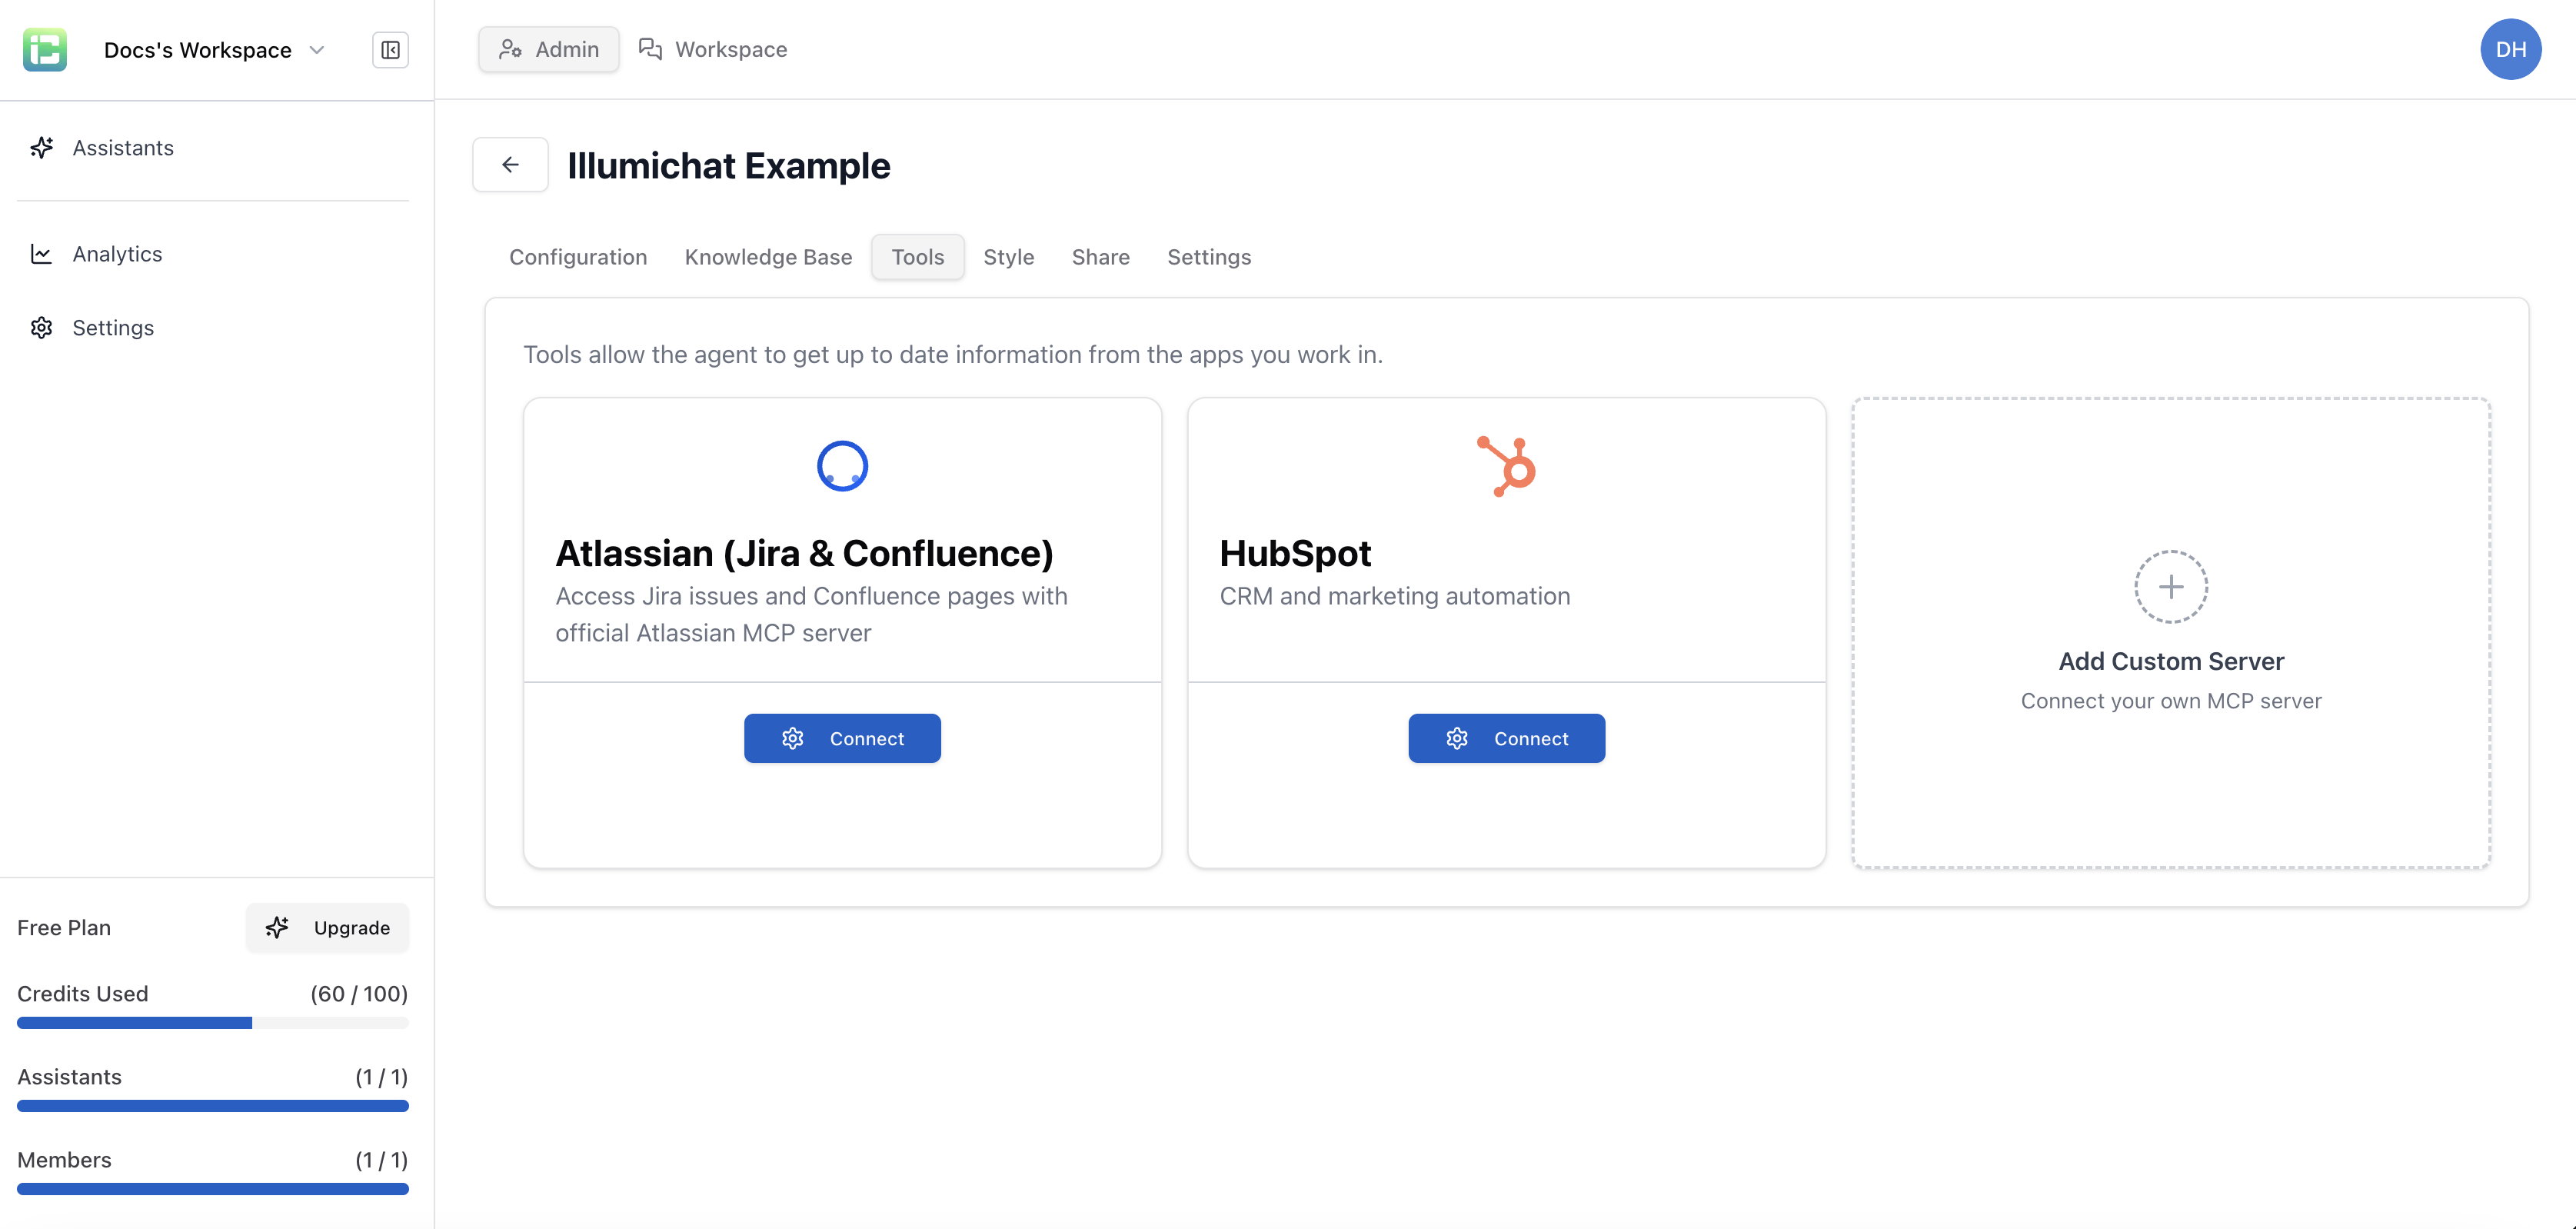
Important: You cannot connect MCP tools to the default “IllumiChat” assistant. Make sure you’re configuring a custom assistant.
2
Initiate Connection
Click “Connect” next to the desired service (e.g., Jira). This will open the OAuth authorization modal.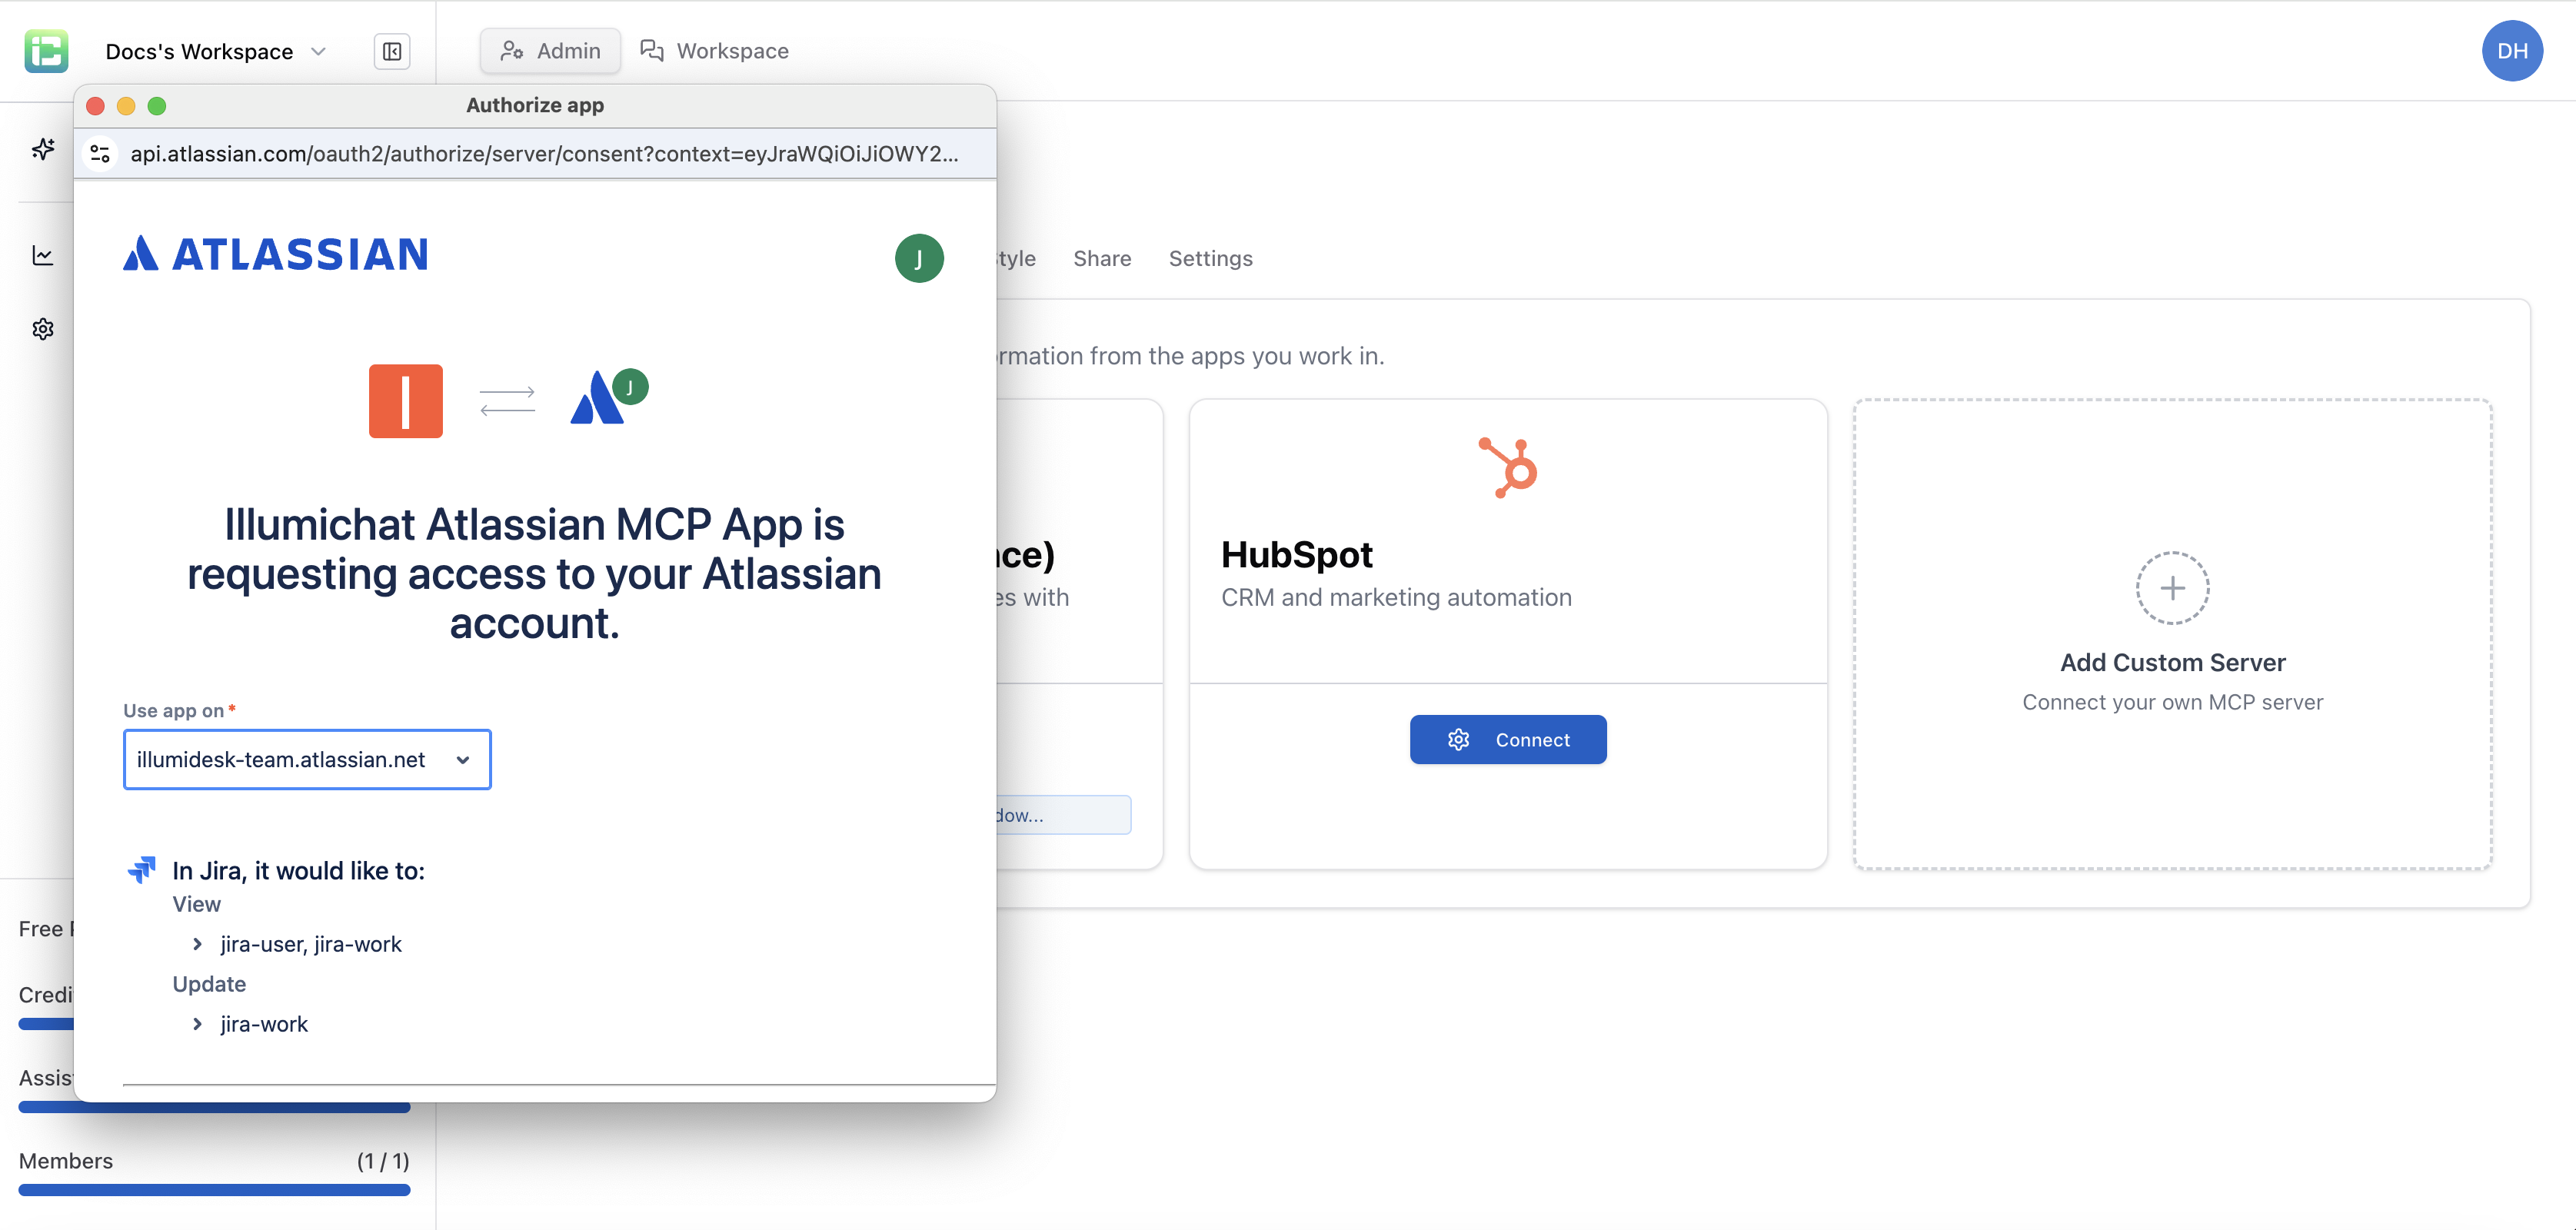
3
Authorize Access
Select your account from the dropdown menu and click “Accept” to grant the necessary permissions.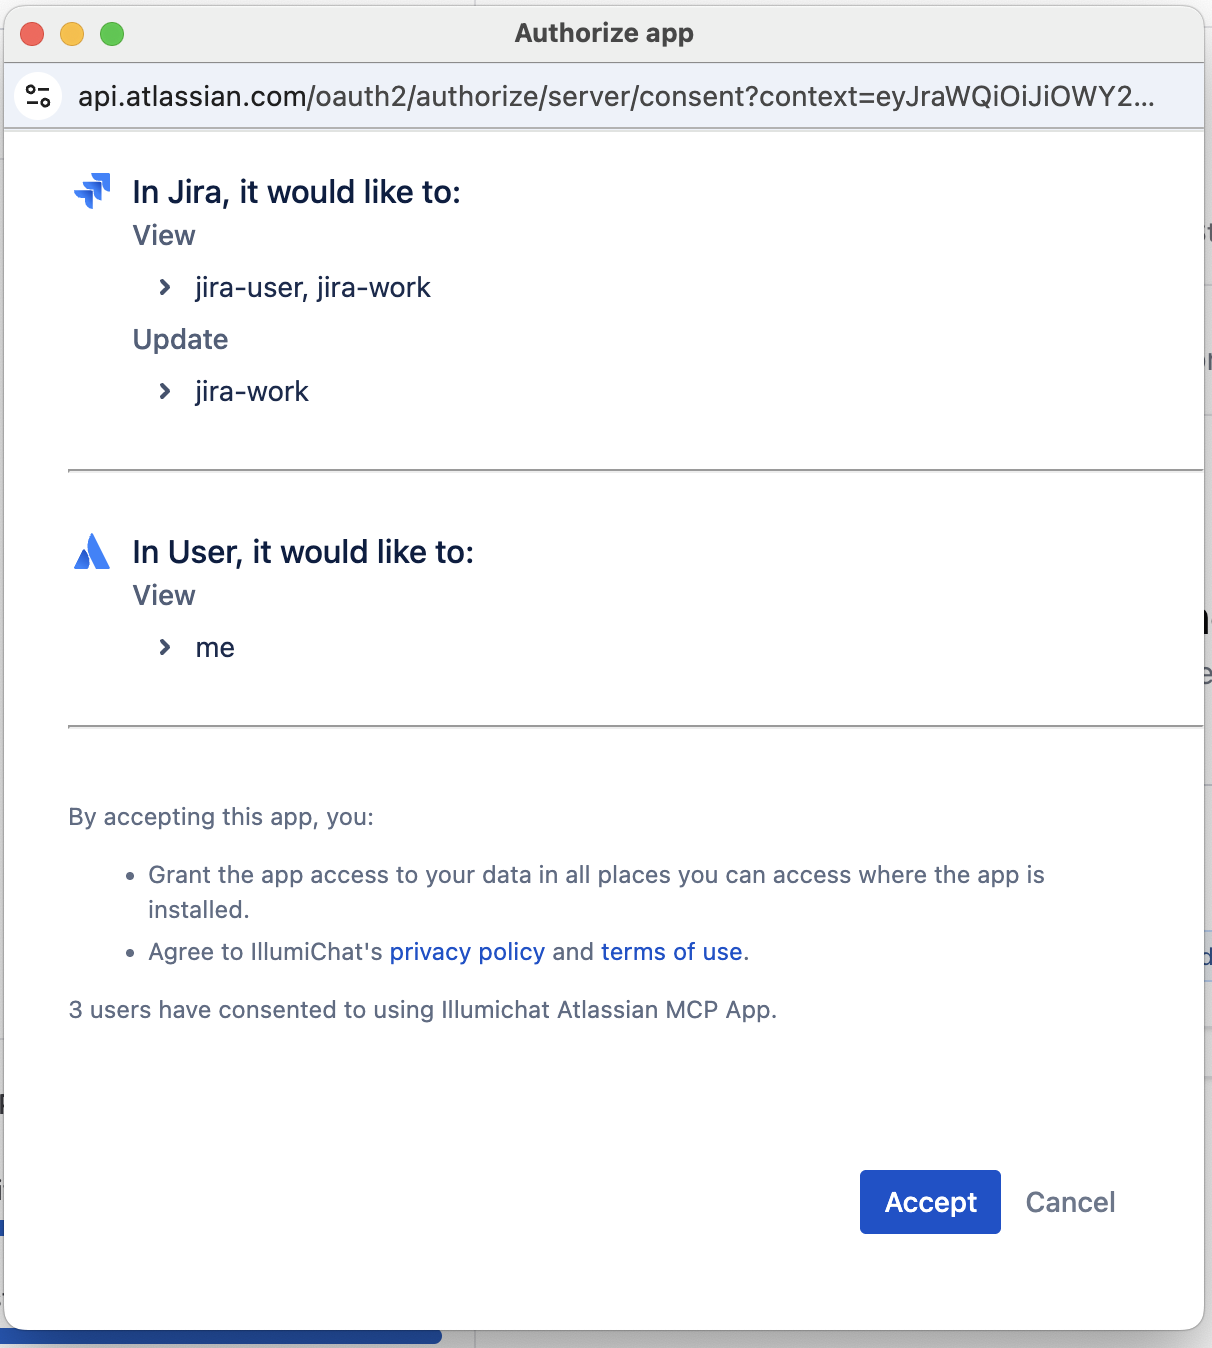
4
Confirm Success
Verify that the connection was established successfully. You should see a confirmation message.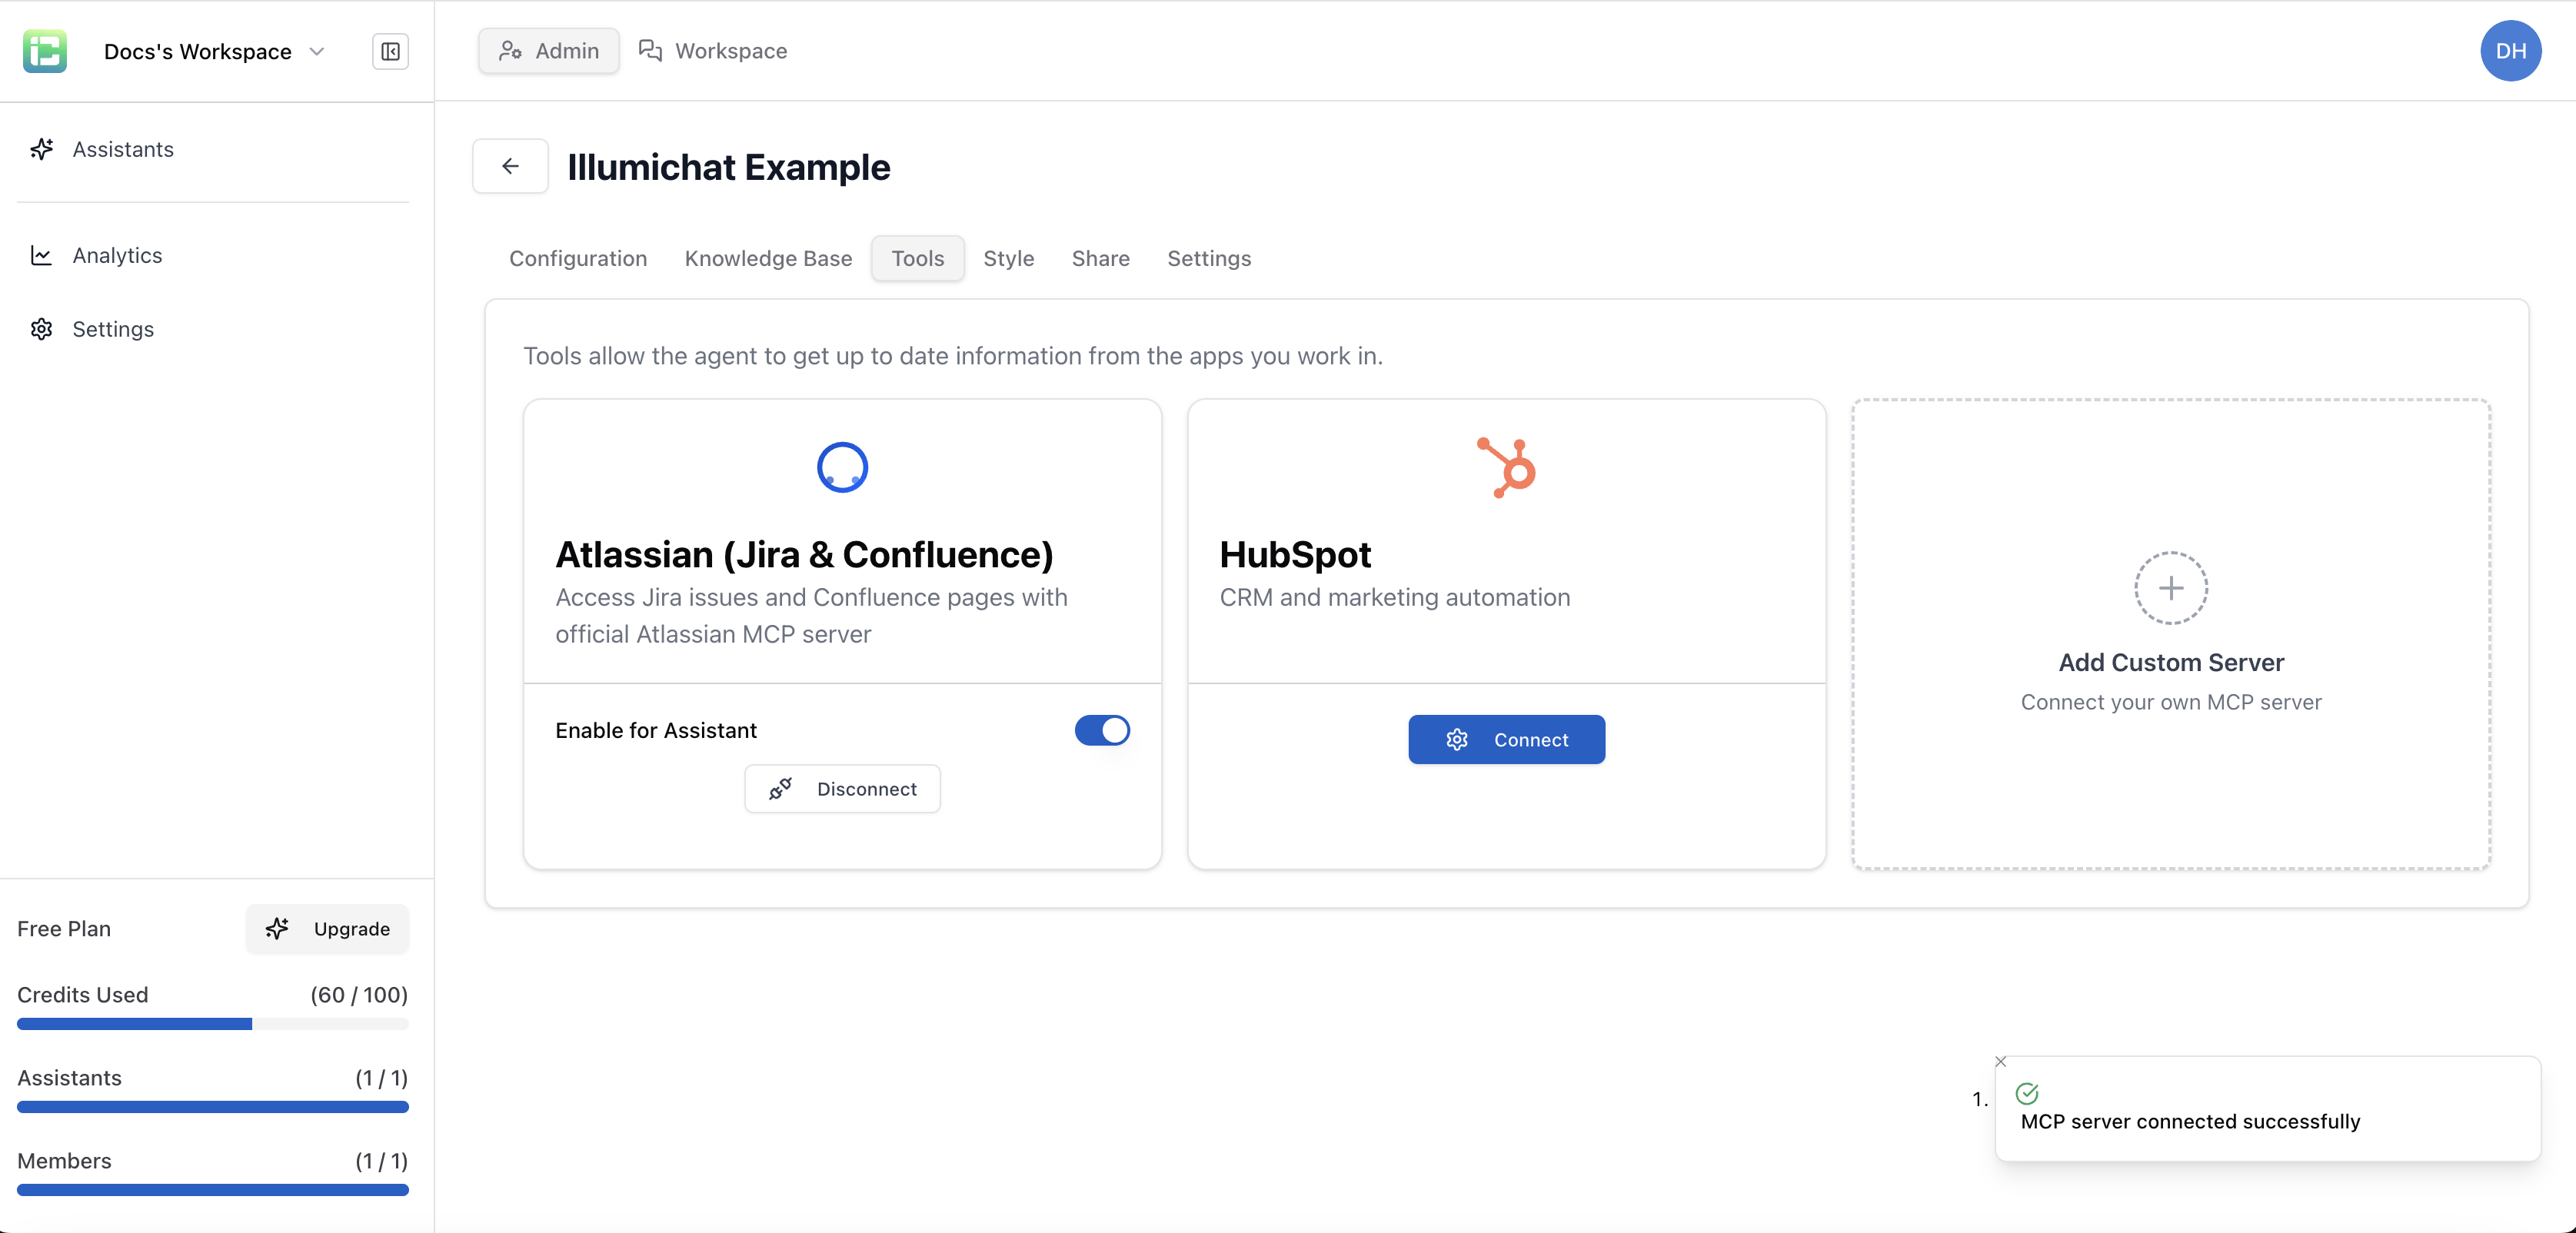
5
Configure Permissions
Set up what data and actions your assistant can access in the connected system.
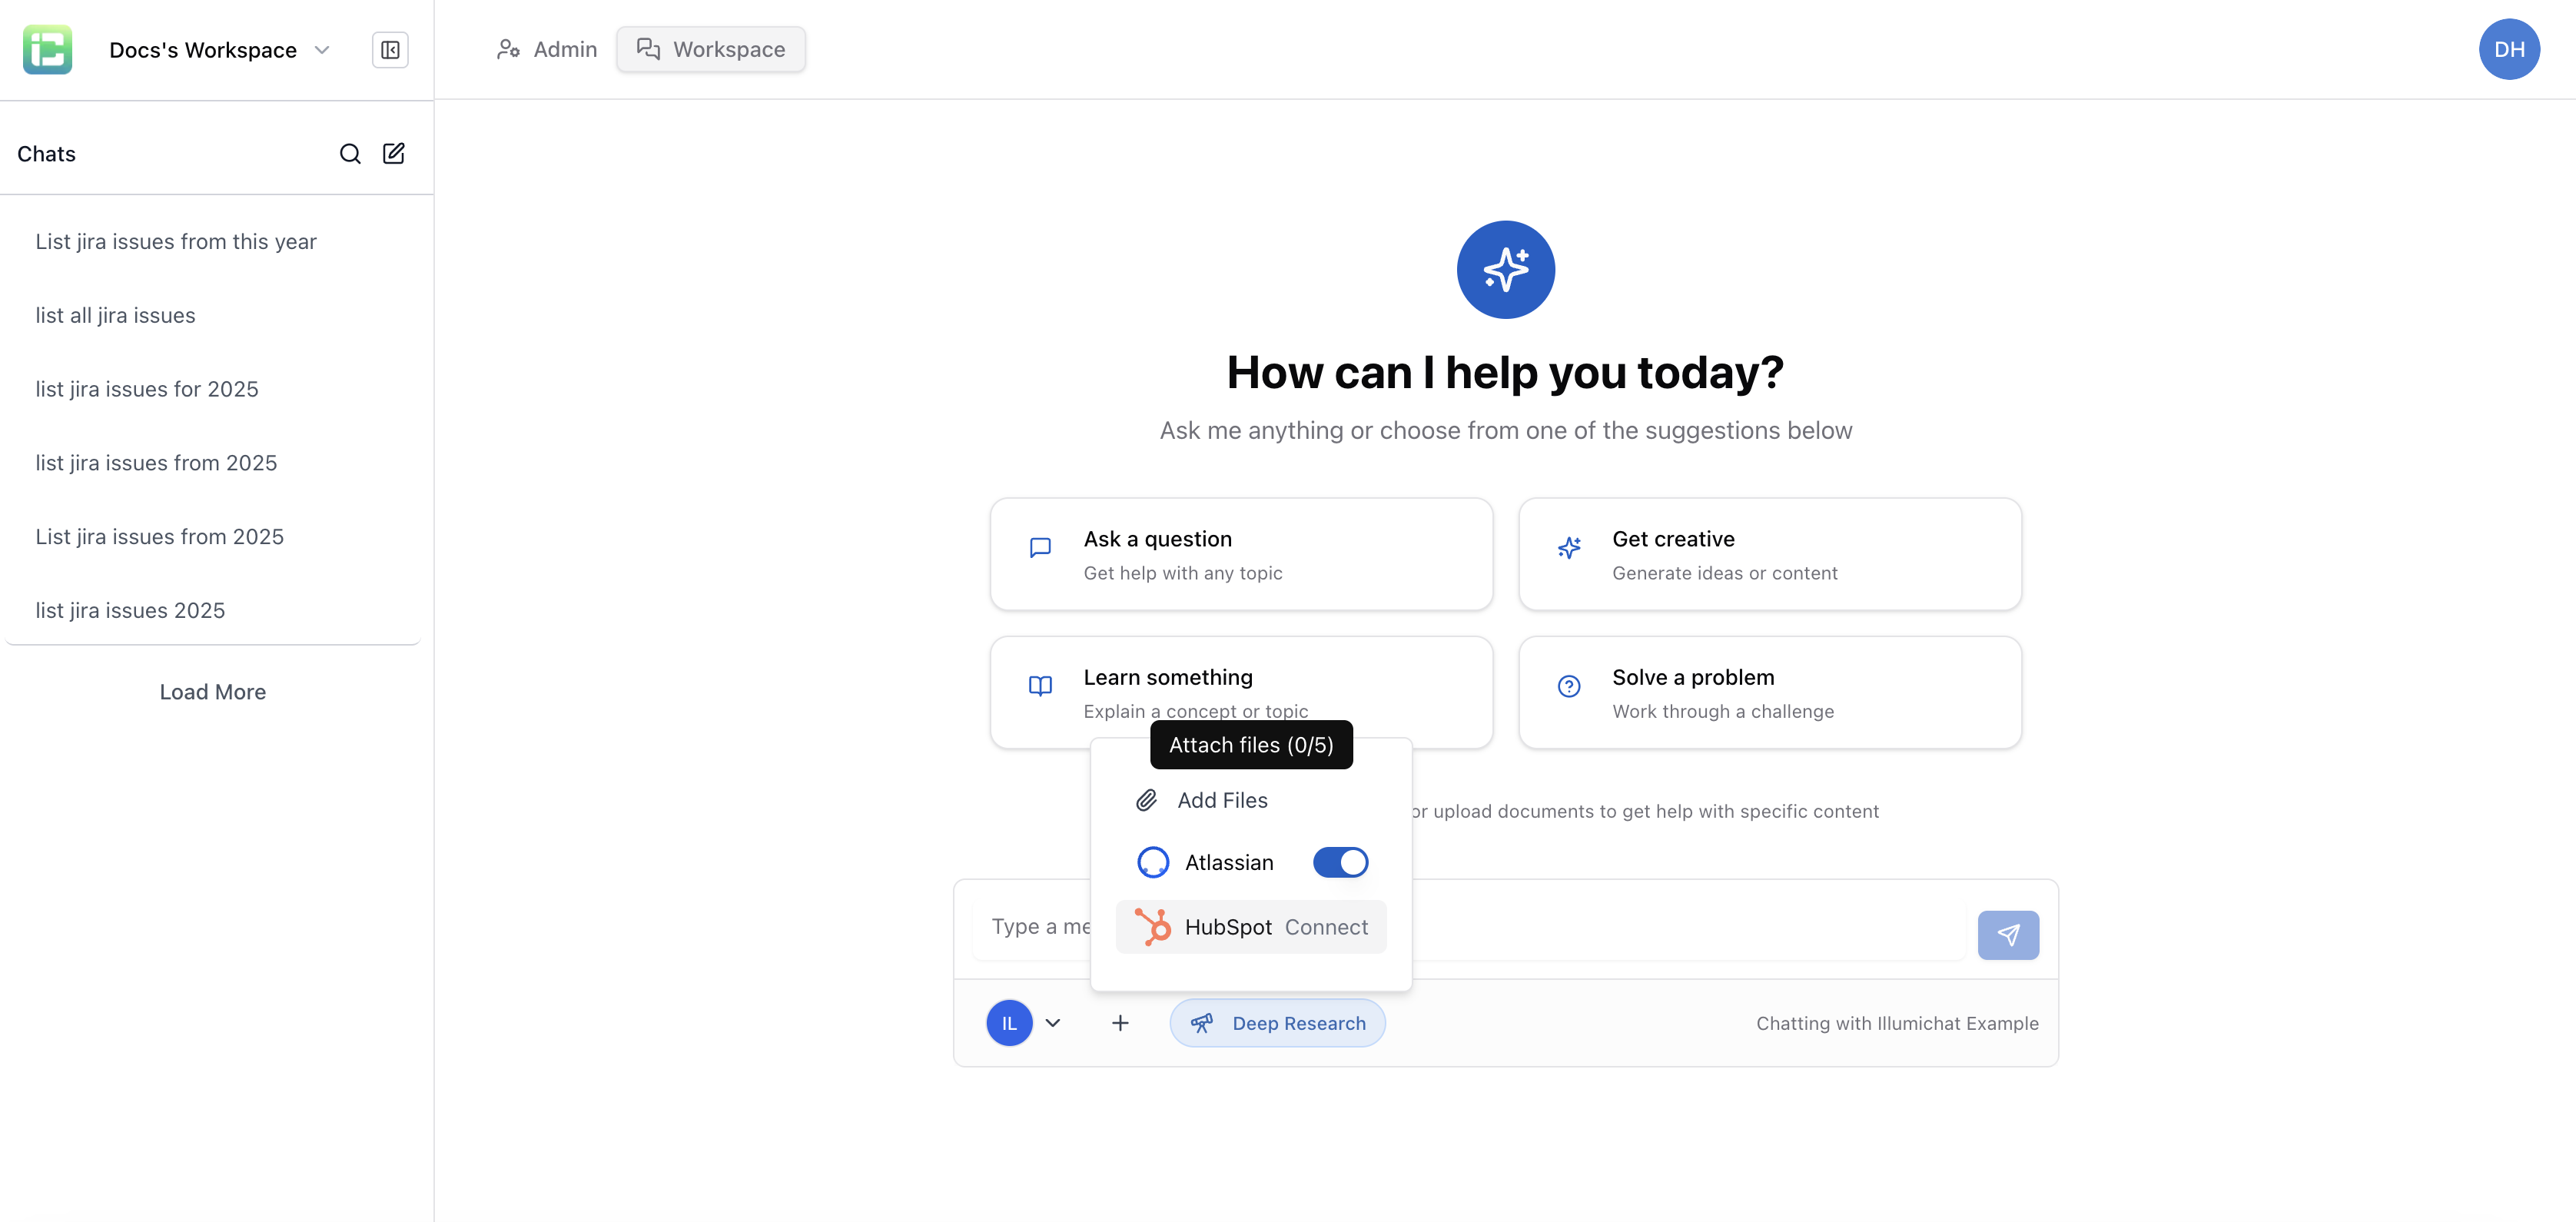
Method 2: Connect via Workspace
You can also connect MCP tools directly from the workspace:- Open your workspace
- Click the ”+” button
- Select “Connect MCP Tools”
- Follow the same connection process as above
Security Considerations
Authentication
- API Keys: Secure storage and rotation of credentials
- OAuth Flows: Use OAuth 2.0 for enhanced security
- Token Management: Automatic token refresh and validation
Data Privacy
- Selective Access: Only request necessary data
- Data Minimization: Limit data retention and usage
- User Consent: Respect user privacy preferences
Access Control
- Role-Based Permissions: Different access levels for different users
- Audit Logging: Track all data access and modifications
- Rate Limiting: Prevent abuse and ensure system stability
Best Practices
1. Start Small
Begin with simple data retrieval before adding complex actions and workflows.
2. Test Thoroughly
- Test with various user scenarios
- Verify data accuracy and timeliness
- Check error handling and fallbacks
- Monitor performance impact
3. Document Integration
- Document what data is accessed
- Explain how the integration works
- Provide troubleshooting guidance
- Keep documentation updated
4. Monitor Usage
- Track integration performance
- Monitor error rates and response times
- Analyze usage patterns
- Optimize based on insights
Common Use Cases
Customer Support
- Access customer information from CRM
- Retrieve order and purchase history
- Create support tickets automatically
- Update customer records
Sales Enablement
- Get real-time deal information
- Access product catalogs and pricing
- Create leads and opportunities
- Track sales activities
Project Management
- Retrieve project status and progress
- Create and update tasks
- Access team information
- Track time and resources
Data Analysis
- Access business intelligence data
- Generate reports on demand
- Provide real-time analytics
- Answer data-driven questions
Troubleshooting
Common Issues
Authentication Failures
Authentication Failures
- Verify API credentials are correct and active
- Check token expiration and refresh settings
- Ensure proper permissions are granted
- Test connection outside of IllumiChat
Data Not Found
Data Not Found
- Verify the data exists in the external system
- Check query parameters and filters
- Ensure proper access permissions
- Review data format and structure
Performance Issues
Performance Issues
- Monitor response times and timeouts
- Check rate limiting and quotas
- Optimize query patterns
- Consider caching strategies
Permission Errors
Permission Errors
- Review user roles and permissions
- Check API scope and access levels
- Verify integration configuration
- Contact system administrator if needed
Next Steps
Data Retrieval Methods
Learn about the differences between knowledge base and MCP data access.
Workspace
Use the workspace for private data analysis with MCP tools.
Assistant Configuration
Configure your assistant’s MCP integrations and tools.
Creating Assistants
Learn how to create assistants that can use MCP tools.